Influencer Journey - ManyTags Help
For Influencers
Influencer Journey: How to Work with Brands on ManyTags
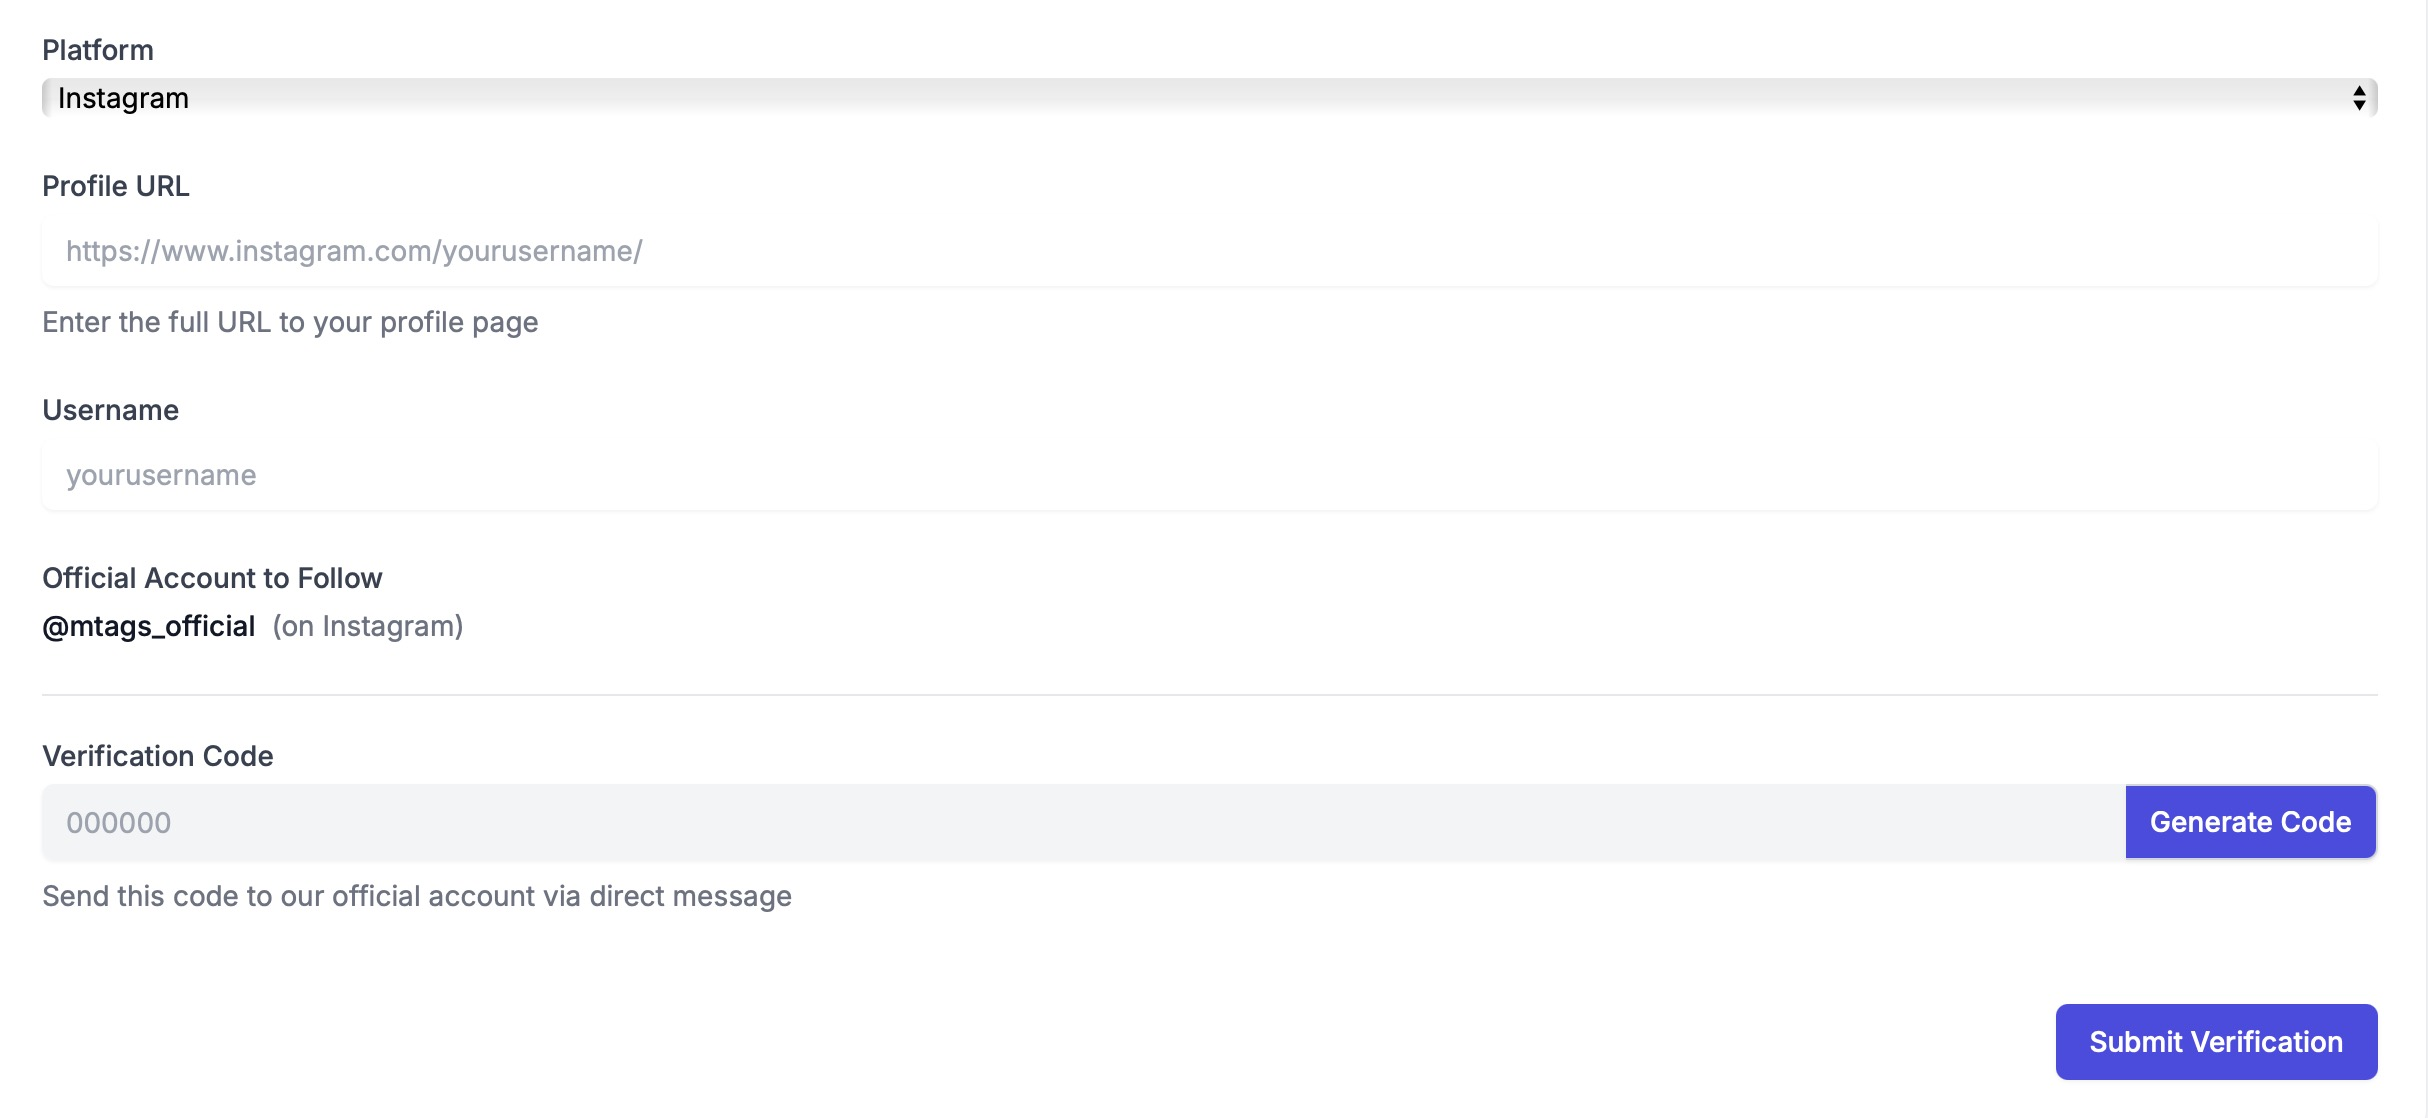
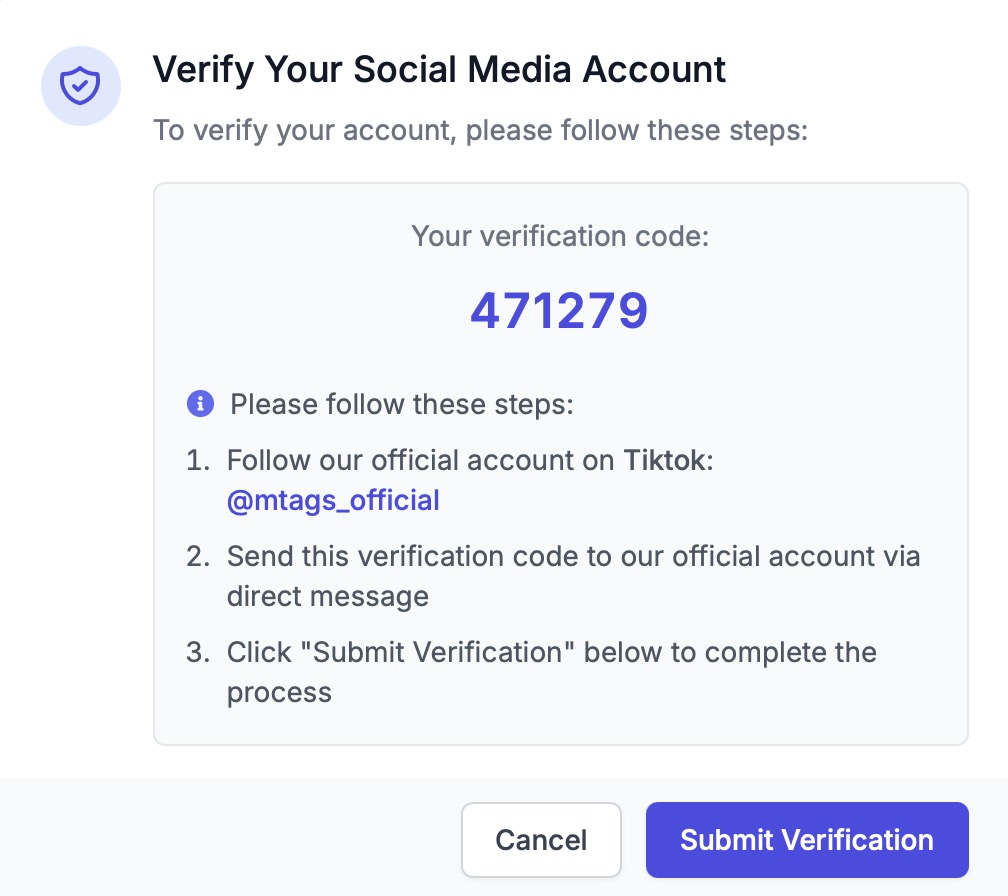
1. Create Account & Set Up Your Profile
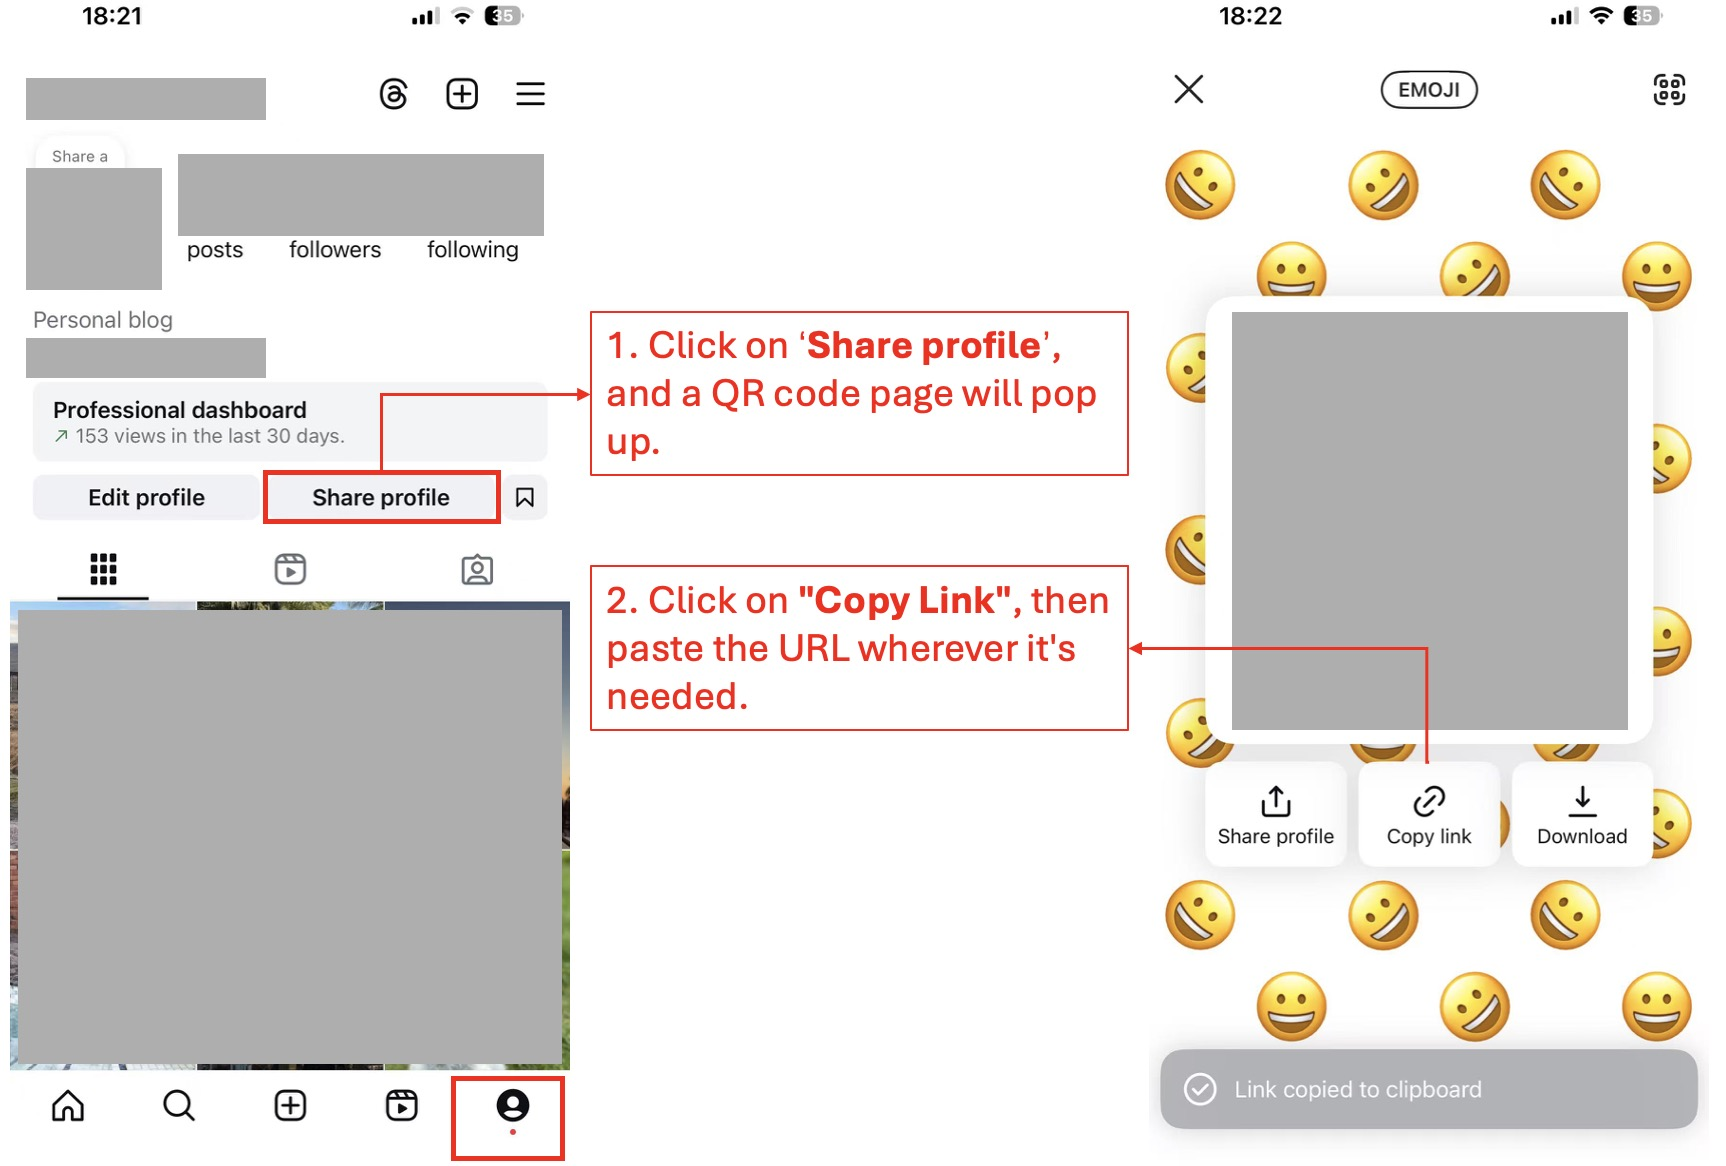
• Create your profile and verify your account. • Add your social media accounts and complete your profile to attract brands. • Upload portfolio content to showcase your work.
Quick Links: - How do I verify my influencer account? - How do I add my social media accounts?
Dashboard Links: - Influencer Profile - Account Verification

2. Browse & Apply for Campaigns
• Browse available campaigns that match your interests and follower requirements. • Read campaign requirements carefully before applying. • Submit a compelling application with your content proposal.
Quick Links: - How do I find campaigns that suit me? - What should I include in my application?
Dashboard Links: - Browse Campaigns - My Applications
3. Wait for Brand Approval
• Brands will review your application and profile. • You’ll receive email notifications about application status. • Be patient as brands may take time to review multiple applications.
Quick Links: - How long does approval take? - Can I contact the brand directly?
Dashboard Links: - Application Status
4. Make Reservations (for Hosted Campaigns)
• For hosted experiences, book available time slots after approval. • Choose dates and times that work for your schedule. • Receive confirmation details including address and reservation code.
Quick Links: - How do I make a reservation? - What if I need to change my reservation?
Dashboard Links: - My Reservations
5. Visit & Experience (for Hosted Campaigns)
• Visit the venue on your reserved date and time. • Present your reservation code for verification. • Enjoy the experience and capture content during your visit.
Quick Links: - What should I bring to my visit? - How do I capture good content during the visit?
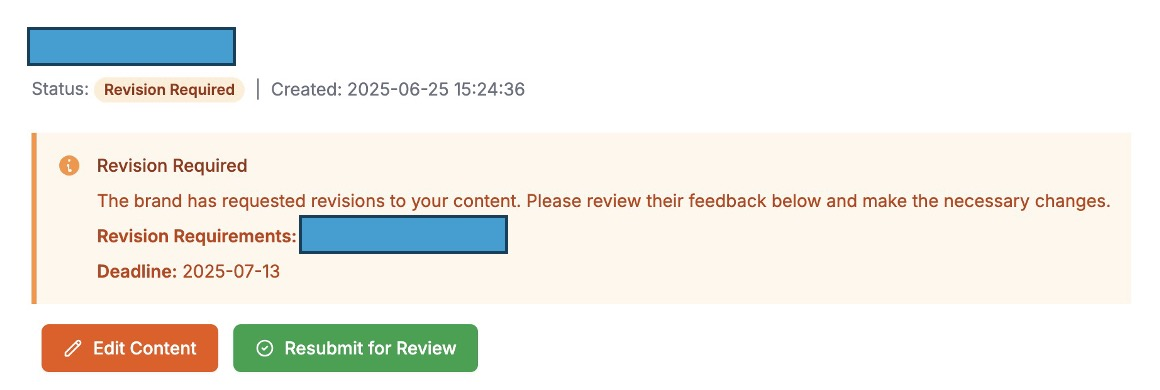
6. Create & Submit Content
• Create content according to campaign requirements. • Submit draft content for brand review before posting. • Wait for brand approval, revision requests, or feedback.
Quick Links: - How do I submit content for review? - What happens if my content needs revisions?
Dashboard Links: - Content Submission
7. Publish Approved Content
• Once approved, publish content on your social media platforms. • Submit the live URLs to the content dashboard. • Ensure all required platforms are covered.
Quick Links: - How do I submit published content URLs? - What if I made a mistake in posting?
Dashboard Links: - Content Management
8. Submit Analytics & Complete Campaign
• Wait 7 days after posting, then submit performance insights. • Upload screenshots of post analytics from your social media platforms. • Campaign will be marked complete once all requirements are met.
Quick Links: - How do I submit analytics data? - What analytics should I include?
Dashboard Links: - Analytics Submission - Campaign Progress
On this page
Related Articles
Explore more helpful resources